Are you just starting a workout routine? Or maybe you’re coming back from an injury and need to start rebuilding slowly to prevent it from recurring? Whatever the reason, if you are just starting out, you may need to modify exercises to fit your needs and current fitness level.
Modifying exercises is a great way for us to learn the proper form to help us get the most out of exercises. It helps us avoid risking injury from trying an exercise that may be too challenging. It can also help us build up so we don’t end up so sore that we aren’t able to develop a workout routine.
Plus, if there is a move you want to build up to, such as maybe a full Push Up or Pull Up, using modified variations can help you slowly progress your strength and build up! But how do you modify moves?
Sometimes it can mean taking out impact from jumping exercises. Or sometimes it can mean using your own bodyweight or finding other ways to lessen the resistance. It can even mean breaking down a move into parts and working on each part individually.
But here are a few basic moves we often see in workout programs and some tips on how you can modify each of them to fit your fitness needs!
The Burpee
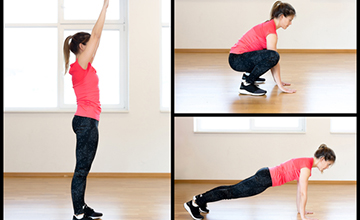
Here are three tips to modify the burpee:
STEP back. Instead of jumping back into plank and jumping back in and up, STEP. This lowers the impact and allows you to move at a controlled pace.
Use a bench. Instead of going all the way down to the ground, place a bench in front of you and place your hands down to the bench as you step or jump back into plank. You can then slowly lower the incline as you become more mobile and able to get lower.
Use the Half Burpee. Sometimes the constant down up of the burpee can get to us and make us feel sick. So instead of getting up and down off the ground, try the Half Burpee. For this move, start in the plank position. Jump or step your feet in toward your hands then back out. This will work your core and still get your heart rate up, BUT you won’t be going and up off the ground!
The Push Up
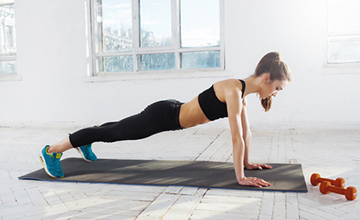
Here are three tips to modify the push up:
Use an incline. If you want to work toward a full push up from your toes with perfect form, you can first start with your hands up on a bench. This incline will help you learn how to engage your core correctly while reducing the amount of resistance you are using. As you get stronger, you can lower the incline and slowly take on more of your own bodyweight. This modification is even better than the knee push up because it teaches you to engage your core like you will need to do for the full push up from your toes.
Use a band. Using a resistance band is another way to reduce the resistance you are using. Place the band a right under your chest while at the top of the push up or wherever you tend to lose control. As you lower to the band and down to the ground, the band will take on some of your weight to provide some assistance so you can replicate the move with proper from.
Do a plank hold. If you don’t have an incline that is the right height, and you can’t perform push ups from your toes with proper form, hold a high plank hold from your hands. You can even try plank holds from other places within the push up motion for quick intervals to help you build up strength.
BONUS: If you have wrist problems, doing push ups off a bar or dumbbells or even a suspension trainer can put your wrist into a neutral position instead of requiring as much flexion, making them easier on your wrists.
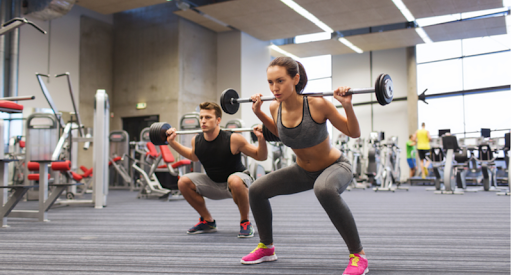
The Squat
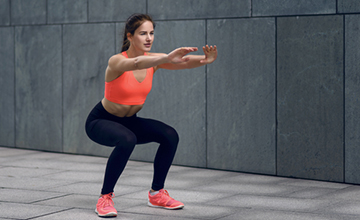
Modifying the squat can be a great way to come back and prevent knee issues and even improve our leg strength.
Here are three tips to modify the squat:
Use a bench. When modifying many moves, the bench is your best friend. With the squat, a bench can not only help you control the depth of the movement, but it can teach you to properly sit back and load your glutes instead of overloading your knees. It can also help you build up both leg and core strength in a safe way. Start by sitting on the bench then stand up driving through your heels.
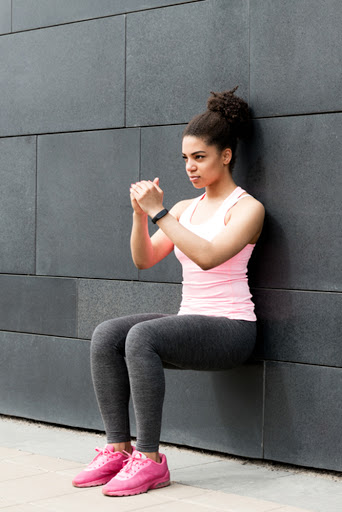
Start with an Isometric version. If you’re just learning to squat or coming back from a knee injury and need to learn how to squat properly, doing a wall sit or a squat hold without the active knee flexion can be a great way to strengthen your legs without you risking doing something wrong as you have to also focus on the movement.
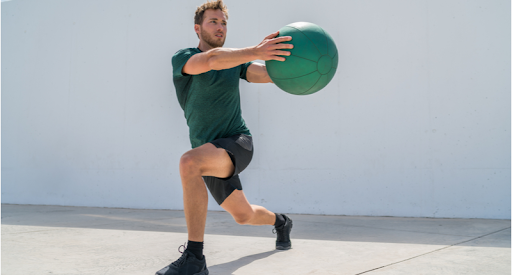
Counterbalance with a weight. Sometimes we can’t squat lower because our core isn’t stable or strong enough and we don’t “trust” ourselves to get lower. So we lean forward and end up hinging at the hips instead of sitting down. Using a weight and pressing it out from our chest to counterbalance, or even holding onto a pole or suspension trainer, can help assist us so we can get lower and work on our mobility.
I know sometimes we just want to jump in and do that harder variation, especially if it is what we used to do, but by modifying we can rebuild our foundation and stay strong without risking injury. I know it can be hard to do a variation we think is “easier” but sometimes we need to REGRESS TO PROGRESS!
Cori is the owner of Redefining Strength, a functional training facility in Orange County, California focused on helping each client find their strong. She started training and writing a fitness blog in 2011 because she wanted to empower people through diet and exercise so that they can lead healthier, happier lives.
Main Photo Credit: Y Photo Studio/shutterstock.com; Second Photo Credit: JRP Studio/shutterstock.com; Third Photo Credit: Master1305/shutterstock.com; Fourth Photo Credit: LarsZ/shutterstock.com